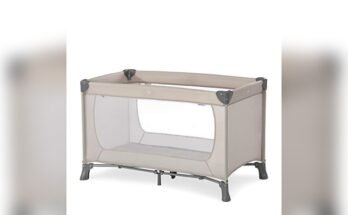
Are you ready to create a safe and cozy space for your little one? Assembling a baby crib might seem tricky at first, but with the right steps, you can do it quickly and confidently.
Imagine the relief and joy you’ll feel once your baby’s crib is set up perfectly, giving you peace of mind every time you put your child down to sleep. In this guide, you’ll find simple, clear instructions that make the whole process easy—even if you’re not a DIY expert.
Keep reading, and you’ll have your baby’s crib ready in no time!

Tools And Materials Needed
Assembling a baby crib requires certain tools and materials. Having them ready helps complete the task smoothly. Using the right tools ensures safety and stability for your baby’s crib.
Basic Tools Needed
You will need a screwdriver, either flathead or Phillips. A hammer may be necessary for some parts. An Allen wrench is common with crib assembly kits. These tools help tighten screws and bolts properly.
Materials Included In The Crib Kit
The crib kit usually contains all wooden panels and slats. It includes screws, bolts, and washers for assembly. Instruction manuals guide you step-by-step through the process. Some kits also have plastic or metal brackets for extra support.
Additional Helpful Items
A small flashlight can help see inside tight spaces. A soft cloth helps clean parts before assembly. Keeping a container for screws prevents loss during assembly. Measuring tape ensures parts align perfectly.
Unpack And Organize Parts
Before you start building the baby crib, unpacking and organizing the parts is important. This step helps you avoid confusion and saves time. It also ensures you have all the pieces needed to complete the assembly.
Take your time to sort the parts carefully. Lay them out on a clean surface. Group similar items together. This makes finding the right piece easier during assembly.
Unpack The Box Carefully
Open the box slowly to avoid damaging parts. Remove packaging materials gently. Check for any small pieces hidden in corners. Keep all screws, bolts, and tools in one place.
Identify And Check Parts
Use the instruction manual to identify each part. Match the parts with the list provided. Confirm you have everything before starting. Report missing parts to the seller immediately.
Organize Parts By Size And Type
Separate large parts like side panels and mattress support. Group small items like screws and washers in containers. This prevents losing tiny pieces. Keep tools ready for easy access.
Prepare Your Workspace
Clear a flat and spacious area for assembly. Make sure the surface is clean and dry. Good lighting helps find small parts quickly. Avoid crowded spaces to work comfortably.
Attach The Side Panels
Attaching the side panels is a key step in assembling a baby crib. These panels form the crib’s main structure. Secure side panels ensure safety and stability. Follow simple steps to attach them correctly.
Prepare The Side Panels And Tools
Start by unpacking the side panels. Check for any damage or missing parts. Gather the tools needed, like a screwdriver or Allen wrench. Keep screws and bolts within reach. This preparation saves time during assembly.
Align Side Panels With The Headboard And Footboard
Place the side panels between the headboard and footboard. Make sure the pre-drilled holes line up well. Proper alignment prevents gaps and wobbling. Take your time to adjust the panels carefully.
Secure The Side Panels With Screws Or Bolts
Insert screws or bolts through the holes. Tighten them using the appropriate tool. Do not overtighten to avoid damaging the wood. Tighten evenly on both sides for balance. Check that the panels feel firm and steady.
Secure The Headboard And Footboard
Securing the headboard and footboard is a key step in assembling a baby crib. These parts provide structure and safety. Tight connections keep the crib sturdy and safe for your baby. Follow the instructions carefully to avoid mistakes.
Work on a flat surface to prevent damage. Gather all screws and tools before starting. This will make the process smooth and fast.
Align The Headboard And Footboard Properly
Place the headboard and footboard upright. Make sure the holes match the side panels. Proper alignment avoids gaps and loose parts. Check both pieces for any damage before attaching.
Insert Screws And Bolts Firmly
Use the screws and bolts provided with the crib. Insert them through the holes carefully. Tighten each screw but avoid over-tightening. Over-tightening can strip the holes or break the wood.
Double-check The Stability
After securing, push gently on the headboard and footboard. The crib should not wobble or move. If it does, tighten the screws again. Stability is essential for your baby’s safety.
Install The Mattress Support
Installing the mattress support is a key step in assembling a baby crib. It holds the mattress firmly and keeps it safe for the baby. This part must be placed correctly to avoid any risk of falling or shifting.
Most cribs come with adjustable mattress supports. You can change the height as your baby grows. Make sure to follow the instructions carefully and use the right tools.
Identify The Mattress Support Frame
Find the mattress support frame in the crib parts. It usually looks like a metal or wooden grid. Check the manual to confirm the exact piece.
Attach The Support Frame To The Crib
Use screws or bolts to fix the mattress support to the crib sides. Align the holes carefully before tightening. A loose frame can be unsafe for the baby.
Adjust The Height Of The Mattress Support
Choose the mattress height based on your baby’s age. Place the support higher for newborns and lower for older babies. This keeps your baby secure and easy to reach.
Double-check All Fastenings
Once installed, check all screws and bolts are tight. Wiggle the frame gently to test stability. Proper fastening prevents accidents and ensures safety.
Check Stability And Safety
Checking the stability and safety of a baby crib is very important. A stable crib keeps your baby secure and prevents accidents. Safety checks help spot loose parts or sharp edges that could hurt your child.
Take time to make sure every piece fits tightly. A well-assembled crib supports your baby’s weight without wobbling. Safety means peace of mind for parents and comfort for babies.
Check All Screws And Bolts
Make sure all screws and bolts are fully tightened. Loose hardware can cause the crib to shake or fall apart. Use the right tools to secure each connection firmly. Recheck after tightening to avoid missing any parts.
Test The Crib’s Stability
Push gently on different sides of the crib. It should not move or rock. A stable crib stays firm on the floor. If it wobbles, check the assembly or tighten the joints again.
Inspect For Sharp Edges And Gaps
Look closely for sharp edges or splinters. Smooth any rough spots with sandpaper or cloth. Check for gaps where your baby’s fingers or limbs might get stuck. Small gaps can be dangerous and need fixing immediately.
Verify Mattress Fit
The mattress should fit snugly inside the crib frame. Too much space between the mattress and sides is unsafe. Your baby could get trapped in these gaps. Choose the right mattress size for a secure fit.
Add The Mattress And Bedding
Adding the mattress and bedding is an important step in assembling a baby crib. This step ensures your baby has a safe and comfortable place to sleep. Choose the right mattress size to fit perfectly inside the crib frame. A mattress that is too big or too small can be unsafe.
Use firm and flat mattresses designed for baby cribs. Soft or old mattresses increase the risk of suffocation. Always check the mattress thickness; it should fit snugly without gaps around the edges.
Choose The Right Mattress Size
Measure the crib’s interior before buying a mattress. Standard crib mattresses usually measure 28 by 52 inches. Avoid mattresses that leave space between the mattress and crib sides. This space can cause safety hazards for your baby.
Select Safe And Comfortable Bedding
Use fitted sheets made for crib mattresses only. Loose blankets or pillows can cause suffocation risks. Select bedding made from breathable, soft materials like cotton. Keep bedding minimal to maintain a safe sleep environment.
Place The Mattress Properly
Lay the mattress flat inside the crib frame. Make sure it does not move or shift easily. Check all corners and sides to confirm a tight fit. A stable mattress helps prevent accidents during sleep or play.
Common Mistakes To Avoid
Assembling a baby crib can be simple with clear steps. Mistakes during assembly can cause delays or safety risks. Knowing common errors helps avoid frustration and ensures safety.
Read through the instructions carefully before starting. Take your time to check each part and tool. Small mistakes can lead to bigger problems later.
Missing Important Parts
Double-check all parts before beginning the assembly. Missing screws or panels can stop the process. Contact the seller if any piece is missing. Do not try to replace parts with wrong items.
Ignoring The Instructions
Follow the manual step-by-step. Skipping steps causes confusion and errors. Each crib model has specific rules. Use the guide to avoid unsafe assembly.
Overtightening Screws
Tighten screws firmly but not too hard. Over-tightening can damage wood or metal. It may also strip the screw holes. Use the right tool and apply moderate force.
Wrong Placement Of Slats Or Panels
Check the orientation of slats and panels. Incorrect placement affects crib stability. Match each part with the diagram carefully. Confirm alignment before fixing screws.
Not Securing The Mattress Properly
Make sure the mattress fits snugly inside. Loose mattresses create gaps that are unsafe. Adjust mattress height as per baby’s age. A secure mattress prevents accidents.
Forgetting To Tighten All Screws
Go over all screws again after assembly. Loose screws can cause wobbling or collapse. Regularly check screws over time for safety. Tighten any that become loose.
Tips For Maintenance And Cleaning
Keeping a baby crib clean and well-maintained is important for your baby’s health and safety. Regular care helps the crib last longer and stay sturdy. It also keeps the sleeping area fresh and comfortable.
Simple steps can make a big difference. Use gentle cleaning products and soft cloths to avoid damage. Check the crib parts often to make sure everything is tight and safe.
Cleaning The Crib Frame
Use a damp cloth with mild soap to wipe the frame. Avoid harsh chemicals that can harm the finish or your baby. Dry the frame well to stop moisture from causing damage. Clean spills immediately to prevent stains.
Washing Mattress And Bedding
Remove the mattress cover and wash it regularly. Use baby-safe detergent to avoid skin irritation. Air out the mattress often to keep it fresh. Change bedding weekly to reduce dust and allergens.
Checking For Wear And Tear
Inspect the crib for cracks or loose screws. Tighten any loose bolts right away. Replace broken parts to keep the crib safe. Look for sharp edges or splinters and smooth them out.
Maintaining Moving Parts
Lubricate wheels or hinges with a baby-safe oil. Ensure smooth movement without noise. Clean dust from joints to prevent wear. Test the moving parts regularly to avoid accidents.

Frequently Asked Questions
How Long Does It Take To Assemble A Baby Crib?
Assembling a baby crib typically takes 30 to 60 minutes. Time varies by model complexity and your experience with furniture assembly.
What Tools Are Needed To Assemble A Baby Crib?
Basic tools include a screwdriver, Allen wrench, and hammer. Most cribs come with required tools and instruction manuals.
How To Ensure Baby Crib Safety During Assembly?
Follow manufacturer instructions carefully. Tighten all screws securely and check for loose parts. Ensure the crib meets safety standards.
Can One Person Assemble A Baby Crib Alone?
Yes, many cribs can be assembled by one person. However, having an extra set of hands speeds up the process.
Conclusion
Assembling a baby crib is easier than it seems. Follow each step with care and patience. Use the right tools and check all parts before starting. Take your time to avoid mistakes or loose screws. A sturdy crib keeps your baby safe and comfortable.
Enjoy creating a cozy space for your little one. Soon, your baby will have a perfect place to sleep and grow. Simple steps lead to great results. Keep this guide handy for future reference.