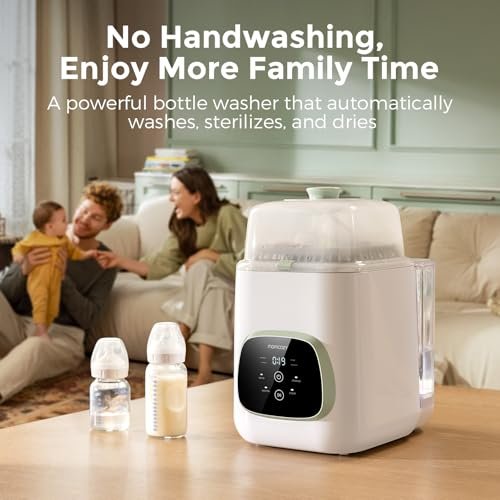
You want to keep your baby’s bottles safe and clean, but mold in your bottle sterilizer can turn that worry into a real problem. Mold doesn’t just look unpleasant—it can harm your baby’s health and affect the cleanliness of every bottle you use.
So, how do you stop mold from growing in your sterilizer? You’ll discover simple, effective steps you can take right now to prevent mold buildup. By following these tips, you’ll protect your baby and make sure your sterilizer stays fresh and safe every time.
Keep reading to learn how easy it is to keep mold away for good.

Causes Of Mold Growth
Mold grows easily in bottle sterilizers because of several common conditions. Understanding these causes helps keep your sterilizer clean and safe. Mold needs the right environment to grow. It thrives on moisture, warmth, poor air flow, and leftover dirt. These factors often appear inside sterilizers after use.
Moisture And Warmth
Moisture is the main cause of mold growth. Sterilizers use steam or water, leaving wet surfaces inside. Warm temperatures help mold spores grow fast. After sterilizing, damp parts stay warm and wet. This creates a perfect place for mold to start.
Poor Ventilation
Air flow stops mold from growing. If your sterilizer stays closed or sealed tight, air cannot dry the inside. Stale, humid air encourages mold spores to settle and grow. Good ventilation helps dry the sterilizer quickly and stops mold from forming.
Residue Build-up
Food or milk residue can remain inside the sterilizer. This leftover dirt feeds mold spores. Even small amounts of residue create a good environment for mold. Cleaning the sterilizer thoroughly after each use removes these particles. This keeps mold from growing.
Regular Cleaning Practices
Keeping your bottle sterilizer free from mold requires regular cleaning. This helps stop mold from growing and keeps the sterilizer safe for your baby. Simple daily care and deeper cleaning routines work together to keep the device fresh and clean. Using the right cleaning agents also plays a big role in preventing mold buildup.
Daily Rinsing
Rinse the sterilizer with warm water after each use. This removes leftover milk or water that mold can feed on. Wipe all parts with a clean cloth to dry them. Dry parts do not allow mold to grow. Make rinsing a quick step in your daily routine.
Deep Cleaning Methods
Perform deep cleaning once a week. Use a soft brush to clean small corners and hard-to-reach spots. Fill the sterilizer with a vinegar and water mix to remove mineral deposits. Let it sit for 30 minutes before rinsing. Deep cleaning removes hidden mold and buildup.
Safe Cleaning Agents
Choose cleaning agents that are gentle and safe for baby items. Use white vinegar or mild dish soap without harsh chemicals. Avoid bleach or strong detergents. These can damage the sterilizer and leave harmful residues. Safe cleaners protect your baby’s health and the device’s lifespan.
Proper Drying Techniques
Proper drying techniques play a key role in stopping mold growth in your bottle sterilizer. Moist places invite mold spores to grow fast. Drying the sterilizer well keeps it clean and safe for your baby’s bottles.
Focus on drying every part of the sterilizer. Water left in small spaces can cause mold. Use good methods to remove all moisture quickly and fully.
Air Drying Tips
Open the sterilizer and leave the lid off after use. Let fresh air flow inside. This dries the inside naturally and lowers dampness.
Place the sterilizer in a dry, cool spot. Avoid humid areas like near sinks or bathrooms. These spots slow drying and help mold grow.
Use a clean cloth to wipe excess water from tight spots. This helps air reach all parts faster. Avoid towels that leave lint.
Avoiding Water Traps
Check for small crevices or corners where water can stay. Tilt the sterilizer to drain hidden water. Look carefully under removable parts.
Remove any trays or racks and dry them separately. These parts often hold moisture in small gaps. Drying them well stops mold build-up.
Store the sterilizer with the lid slightly open. This stops moisture from getting trapped inside. It also keeps air moving to prevent dampness.

Storage Recommendations
Proper storage helps keep your bottle sterilizer free from mold. Moisture and poor air flow cause mold growth. Follow simple steps to store your sterilizer safely. This keeps it clean and ready for use.
Keep Sterilizer Open
Store the sterilizer with the lid open. This allows air to circulate inside. Air flow helps dry any leftover moisture. Mold grows in dark, damp places. Leaving it open stops mold from forming.
Choose Dry Locations
Pick a dry spot for your sterilizer. Avoid damp areas like near sinks or windows. Moist places increase mold risk. A dry shelf or cupboard works best. Clean and dry surroundings protect your sterilizer.
Use Of Anti-mold Solutions
Preventing mold in your bottle sterilizer keeps your baby’s bottles safe. Anti-mold solutions help stop mold from growing inside the sterilizer. These solutions can be natural or commercial products.
Using the right anti-mold solution makes cleaning easier. It also protects your sterilizer from damage and keeps it fresh.
Natural Remedies
Natural remedies use simple ingredients to fight mold. White vinegar is a popular choice. It kills mold spores and removes odors. Mix equal parts of vinegar and water. Wipe the inside of the sterilizer with this mix. Let it sit for 10 minutes, then rinse well.
Baking soda also works well. Make a paste with baking soda and water. Apply it to moldy spots. Scrub gently and rinse with warm water. Lemon juice can help too. It has natural antibacterial properties. Use lemon juice to wipe the sterilizer and freshen it up.
Commercial Products
Commercial anti-mold products are made for sterilizers. They often come as sprays or wipes. Choose products labeled safe for baby items. Follow the instructions carefully for best results.
These products kill mold quickly and prevent new growth. Some also remove tough stains and smells. Using commercial products regularly helps keep your sterilizer clean and safe. Check the ingredients to avoid harsh chemicals.
Maintenance And Inspection
Maintenance and inspection are key to stopping mold in your bottle sterilizer. Mold grows fast in damp, warm places. Regular care keeps your sterilizer clean and safe for your baby’s bottles.
Check your sterilizer often. Look for any signs of mold or dirt. Clean it well after every use to stop mold from growing. Small steps help keep your sterilizer fresh and hygienic.
Regular Checks
Inspect your sterilizer before each use. Look inside for any mold spots or leftover water. Wipe all surfaces with a clean cloth. Make sure the sterilizer is dry before closing it. This prevents mold from getting a chance to grow.
Replacing Parts
Replace worn or damaged parts quickly. Seals and gaskets can trap moisture and mold. Old parts do not clean well and invite mold growth. Check the manual for replacement schedules. Keep spare parts ready to maintain hygiene easily.

Frequently Asked Questions
How Often Should I Clean My Bottle Sterilizer?
Clean your bottle sterilizer after every use to prevent mold growth. Use mild soap and warm water, then dry thoroughly before storing.
What Is The Best Method To Dry A Sterilizer?
Air-dry your sterilizer completely after cleaning. Avoid sealing it while damp, as trapped moisture encourages mold development.
Can Vinegar Prevent Mold In Bottle Sterilizers?
Yes, using white vinegar as a rinse helps remove mineral deposits and inhibits mold growth naturally.
Should I Leave The Sterilizer Lid Open When Not In Use?
Yes, keeping the lid open allows air circulation, reducing moisture buildup and preventing mold formation inside.
Conclusion
Preventing mold in your bottle sterilizer is simple with regular care. Clean the sterilizer after each use and dry it well. Avoid leaving water inside for long periods. Store the sterilizer in a dry place. Using these easy steps keeps your device safe and clean.
This helps protect your baby’s health. A clean sterilizer means fewer worries and better hygiene. Small habits make a big difference. Keep your sterilizer mold-free and work smoothly every time.